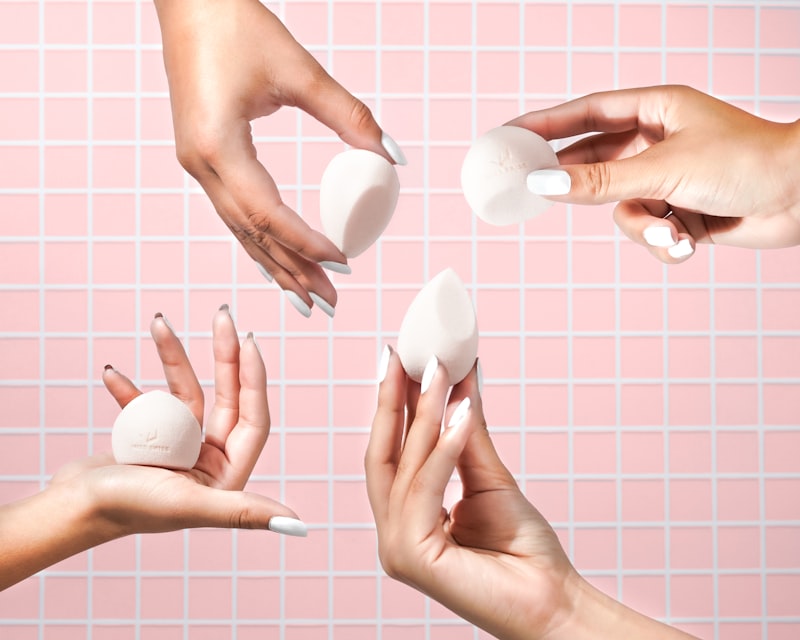
Foundation Brush vs. Beauty Blender: Which Works Better?
A side-by-side comparison of foundation brushes and beauty blending sponges — coverage, finish, blending time, and which one actually suits your skin type.
By Rita Almusa, Licensed Master Esthetician — 20+ years of experience
Introduction
I already covered the basics of applying foundation with a brush, but the question I get asked constantly is which tool is actually better: a foundation brush or a beauty blending sponge. The honest answer is that neither one wins outright — they behave differently on skin, and the right choice depends on the finish you want and the skin type you’re working with. Here’s an actual side-by-side breakdown so you can decide for yourself.
How Each Tool Actually Works
A flat-top kabuki brush applies product in a thin, even layer and buffs it into the skin using small circular motions. It picks up less product overall and gives you more control over exactly how much coverage builds in each area. A damp beauty sponge, on the other hand, works by bouncing (stippling) product onto the skin — the damp sponge absorbs some of the product and diffuses it as you press, which tends to leave a more skin-like, diffused finish.
Coverage Comparison
Brush: Builds coverage faster since less product gets absorbed into the tool itself. If you want fuller, more opaque coverage without multiple layers, a brush gets you there quicker.
Sponge: Coverage builds more gradually because the damp sponge soaks up some product before it ever reaches your skin. This makes it more forgiving if you’re worried about over-applying, but it can mean going back for a second pass if you need more coverage in specific areas.
Finish Comparison
Brush: Tends to read slightly more matte, especially on oilier skin types, since it presses product into the skin rather than diffusing it.
Sponge: Produces a dewier, more “your skin but better” finish because the bouncing motion blends foundation into the skin’s texture rather than sitting on top of it uniformly.
Blending Speed
Brush: Faster overall — a full face typically takes less time with a brush because you’re covering more surface area per stroke and building coverage in fewer passes.
Sponge: Slower, more meticulous. The stippling motion by nature takes longer per area, though many people find it more relaxing and easier to control precisely.
Cost and Longevity
Brushes and sponges also differ in how long they last and what they cost over time. A quality synthetic foundation brush, cared for properly, can last a year or more with regular washing. Beauty sponges degrade faster — the material breaks down with repeated wetting and squeezing, and most estheticians recommend replacing one every three months or so, especially with daily use. If you’re budgeting for the long term, a brush is generally the more cost-effective choice, even though the upfront price is often higher.
Which Skin Types Suit Each Tool
- Oily or combination skin: A brush’s more matte-leaning finish and faster buildable coverage tends to hold up better through the day.
- Dry or textured skin: A damp sponge’s diffused, dewy finish sits better on dry patches and fine texture, since it doesn’t emphasize dry areas the way a drier brush application can.
- Sensitive skin: Either tool works, but a sponge’s gentler, bouncing motion is often more comfortable on reactive or easily irritated skin than a brush’s buffing pressure.
Step-by-Step: Getting the Best Result From Each
Using a Foundation Brush
- Apply primer and let it set.
- Dot foundation onto cheeks, forehead, nose, and chin.
- Use small circular buffing motions, working from the center of the face outward.
- Build in thin layers rather than one heavy pass.
- Blend the hairline and jaw carefully to avoid visible lines.
Using a Beauty Blender
- Wet the sponge fully and wring it out until it’s damp, not dripping.
- Apply foundation directly to skin or the back of your hand, then pick up product with the sponge.
- Bounce (don’t drag) the sponge onto skin in small, quick presses.
- Use the pointed tip for precision areas like under the eyes and around the nose.
- Build coverage gradually, re-wetting the sponge as needed to keep the finish diffused.
The Beauty Tips Guide
20+ years as a Licensed Master Esthetician and Makeup Artist, condensed into one guide.
Common Mistakes With Each Tool
- Dragging a sponge instead of bouncing it — this streaks foundation rather than blending it.
- Using a bone-dry sponge — a dry sponge absorbs far more product than a damp one, wasting foundation and giving patchier coverage.
- Overloading a brush — too much product on a brush leads to uneven buildup and visible brush strokes.
- Not cleaning either tool regularly — bacteria and old product buildup affect application quality on both, and it’s a skin health issue too.
How to Clean Each Tool Properly
Cleaning a Foundation Brush
Wet the bristles with lukewarm water, work a gentle cleanser or brush shampoo into the bristles in your palm, and rinse until the water runs clear. Reshape the bristles and lay the brush flat to dry — never stand it upright while wet, since water can loosen the glue holding the bristles in the handle.
Cleaning a Beauty Sponge
Wet the sponge and work a gentle cleanser into it, squeezing (not twisting) to push product out. Rinse thoroughly until no more color releases into the water, then squeeze out excess moisture and let it air dry fully before storing. A sponge that’s stored damp is the fastest way to grow bacteria.
Can You Use Both?
Yes, and honestly this is what a lot of makeup artists actually do. A common approach is applying the bulk of your foundation with a brush for speed and coverage, then going back over with a slightly damp sponge to diffuse and blend the edges for a softer finish. You get the buildable coverage of a brush with the seamless finish of a sponge.
Pro Tips
- Match your tool to your foundation formula — thicker, full-coverage foundations often blend better with a brush; lighter, dewy formulas often look best applied with a sponge.
- Always apply primer first regardless of which tool you use — it affects how well either tool glides and blends.
- Keep both tools clean — a weekly wash with a gentle cleanser keeps either one performing consistently.
- Set with powder using a brush, not a sponge — a fluffy powder brush is far more effective than a sponge for setting.
Frequently Asked Questions
Is a beauty sponge more hygienic than a brush? Not inherently — both need regular cleaning. A damp sponge in a humid bathroom can actually harbor bacteria faster than a brush if it isn’t dried and washed properly between uses.
Which tool wastes less product? A brush typically wastes less foundation than a sponge, since a damp sponge absorbs a portion of the product before it reaches your skin.
Can I use a beauty sponge for powder products too? Yes, a dry sponge works well for pressing powder products into skin, though a fluffy brush is generally better for a light, even powder application than a sponge is.
How often should I actually replace each tool? A well-maintained brush can last a year or longer. A beauty sponge, because the material breaks down with repeated use and washing, is best replaced every two to three months.
Conclusion
There’s no universal “better” tool here — it genuinely comes down to the finish you’re after and your skin type. If you want fast, buildable, more matte coverage, reach for the brush. If you want a diffused, dewy, skin-like finish and don’t mind spending a little more time blending, the sponge wins. Watch the full comparison in the video above, and don’t be afraid to keep both in your routine for different days and different looks. ✨
Related Posts

Mature Skin Makeup: How to Get Fuller-Looking Cheeks Without Filler
A makeup artist's technique for creating the look of fuller, lifted cheeks on mature skin using contour and highlight — no injections required.
Bronze Soft Glam Makeup That Makes You Look Radiant
A step-by-step bronze soft glam makeup tutorial for a warm, radiant, dewy finish — easy enough for everyday wear, glam enough for a night out.
How Do Magnetic Lashes Look So Natural? A Full Application Tutorial
A step-by-step tutorial for applying magnetic lash extensions for a natural, salon-quality finish, plus tips for making them last longer.

This Fall Makeup Look Works on Everyone: A Get-Ready-With-Me Tutorial
A versatile, easy fall makeup look that flatters every skin tone and eye shape — a full get-ready-with-me tutorial from base to lips.